Going away on holiday or just want to make watering a little easier? Here’s how to set up a drip irrigation kit in six simple steps.
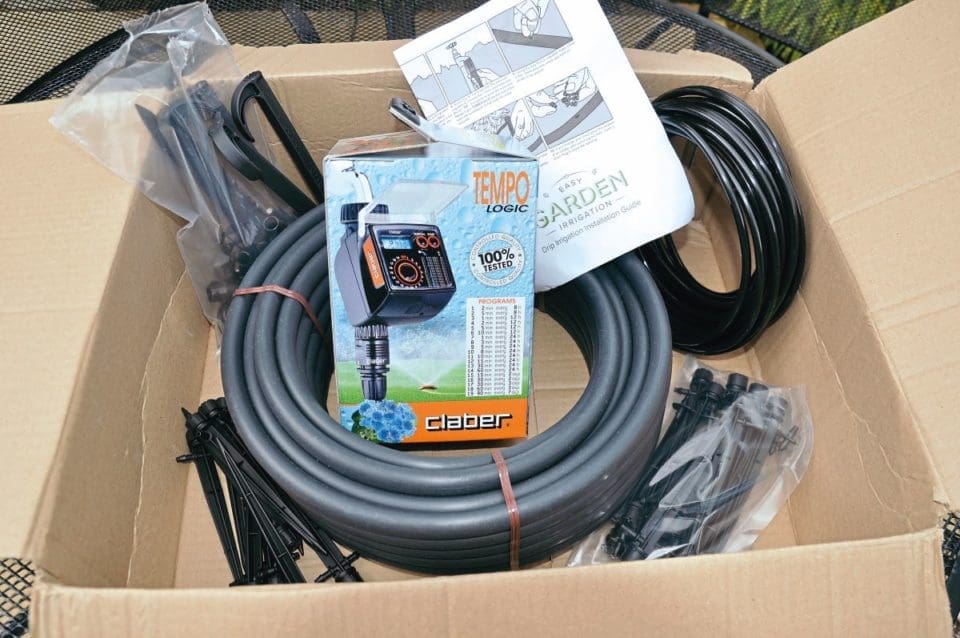
There is a fantastic range of watering kits available, some designed to be fed by the mains supply, others from a water butt or other reservoir. The 25 Adjustable Dripper Kit, from www.easygardenirrigation, for example, comes with all you need to water up to 25 plants, either planted in the ground or in pots. Add a water timer and you can set for how long and how often the system operates.
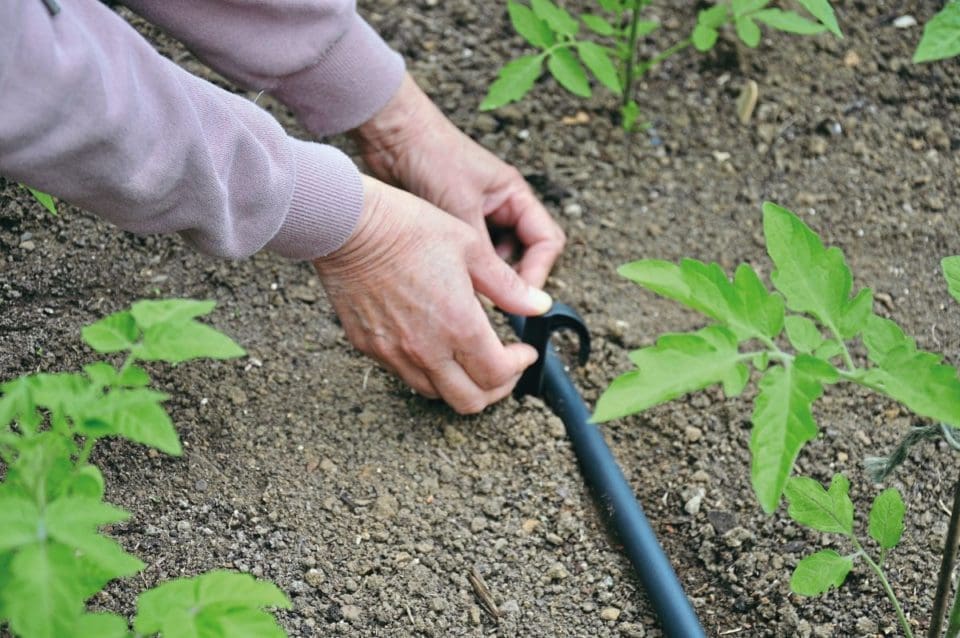
STEP 1
Having decided where your watering system is to go, lay out the main tubing according to your plan and pin in place with the Hold Down Spikes provided
Enjoy more Kitchen Garden Magazine reading.
Click here to subscribe & save.
STEP 2
Use the Key Punch supplied to make a hole in the main tubing. If you make a mistake don’t worry as plugs are supplied to block unwanted holes

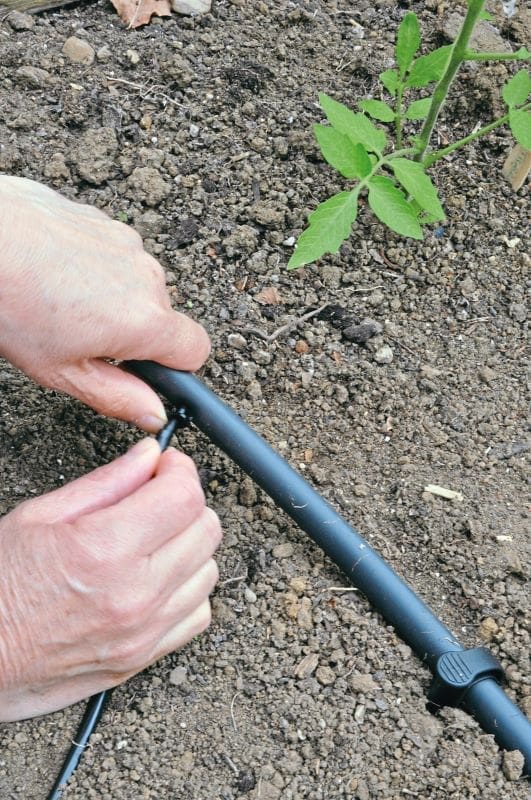
STEP 3
Disconnect the adaptor from the spike and push the soft 4mm tubing on one outlet. Push the other outlet in to the hole in the main tubing
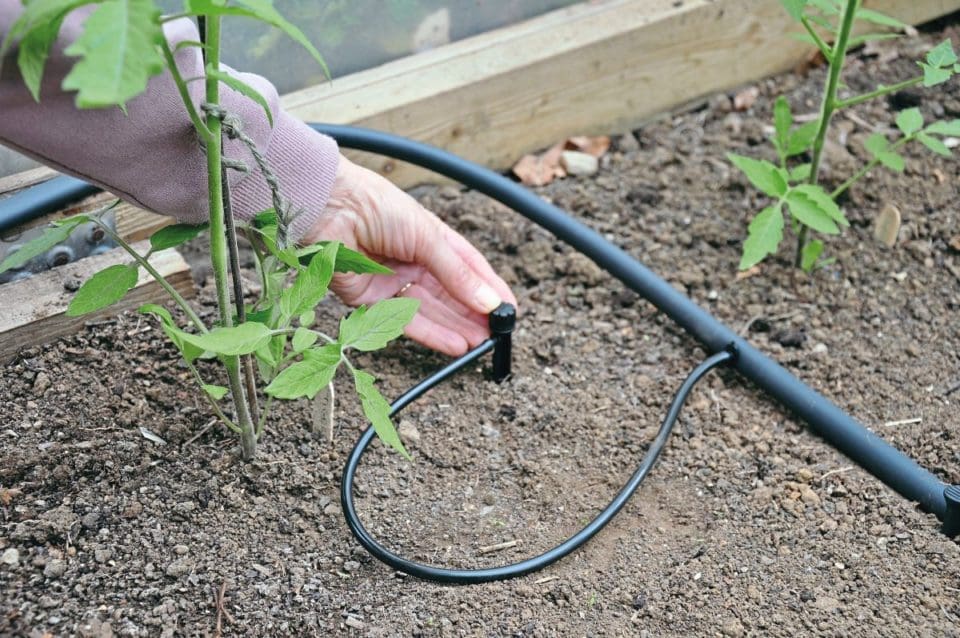
STEP 4
Unroll the soft tubing to where you want the watering spike to be and cut to the required length. Push the tubing firmly on to the adaptor of the watering spike and insert into the soil.
STEP 5
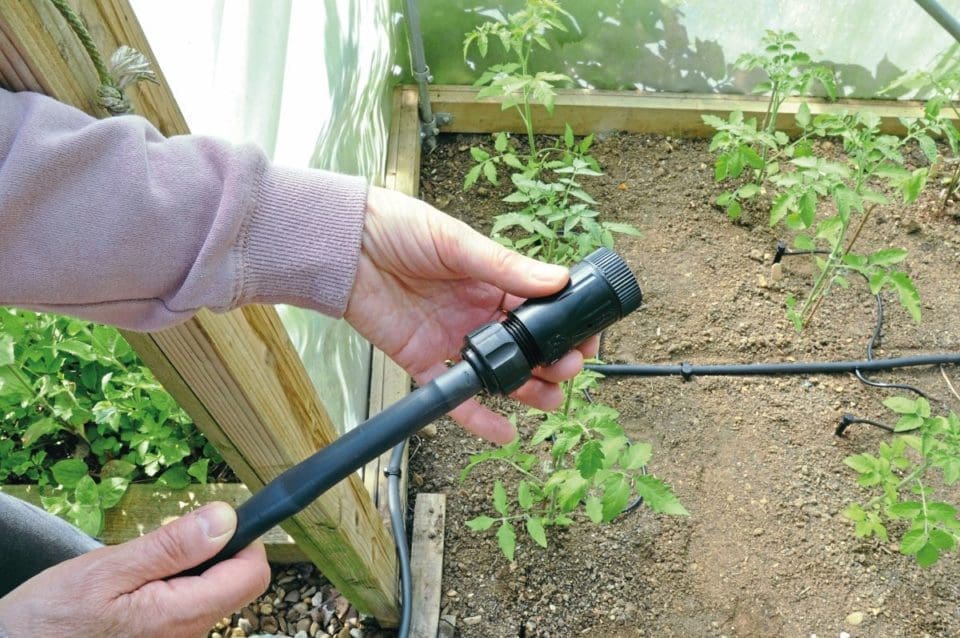
Fix the pressure regulator to the end of the main tubing and connect to your tap or to a water timer if using one. This piece of kit is essential to stop excess pressure from popping the pipes apart.
STEP 6
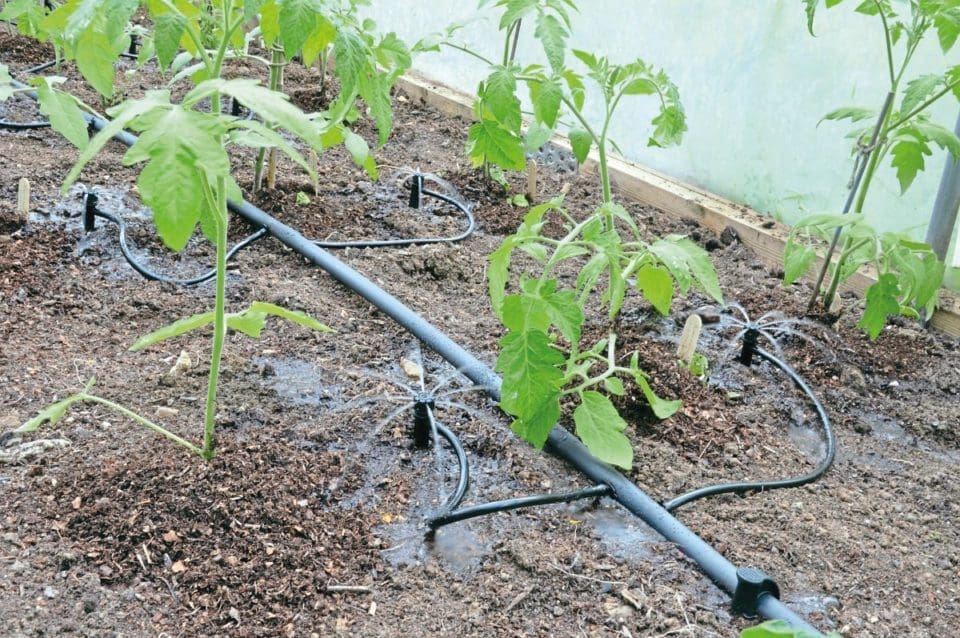
With the water connected adjust each watering spike to the required output from drip to sprinkle. We used two spikes for every three plants or you could add a spike to each pot or container.
TOP TIPS FROM AN EXPERT
Sean Lade from Easy Garden Irrigation says:
■ A drip irrigation system is the most efficient type of automatic watering system. Place drip emitters where you want to deliver water. Drip emitters release water slowly, so you can be precise with the amount of water released and it will prevent runoff. For even more efficiency, mulch over the soil to shade it and prevent the water evaporating.

■ Invest in a water timer to schedule when your irrigation system turns on and off. The best time to water is either early morning or late evening. A common upgrade is a rain sensor or moisture sensor to use with the water timer, especially if you plan to go away for an extended period.
■ Install a pressure reducer to prevent unexpected problems while away. Irrigation systems are designed to work best at low water pressure. High spikes of water pressure can blow off joints and cause a flood in the garden.
■ Keep it simple. Think about the essentials. We want to think about watering the plant pots while we’re away. Do we need to water the lawn? It can survive a week or two without water. It’s great to build a system that can water it all, but if you’re going away soon, just stick to the essentials; you can always upgrade the system later.
■ Good drainage is essential. Using an automatic irrigation system means you have a regular supply of water for your plants. Good drainage ensures that you don’t overwater, especially if you’ve forgone a rain sensor.