With April showers on the way, now may be a good time to install a water butt.
Why install a water butt?
Water butts are an effective way to collect and store rainwater in the wetter months of the year, ensuring a decent supply you can tap into when the drier months arrive.
Even putting aside the risk of a hosepipe ban, having a water butt installed in your garden is always useful. It is also more sustainable, reusing rainwater which would otherwise go straight down the drain. Plus, with bills on the rise, a water butt can ultimately prove cheaper too.
Enjoy more Kitchen Garden Magazine reading.
Click here to subscribe & save.
What to consider before buying a water butt
Firstly, shape and size. There are many different options available. For example, if space is an issue in your garden, you might consider a slimline option.
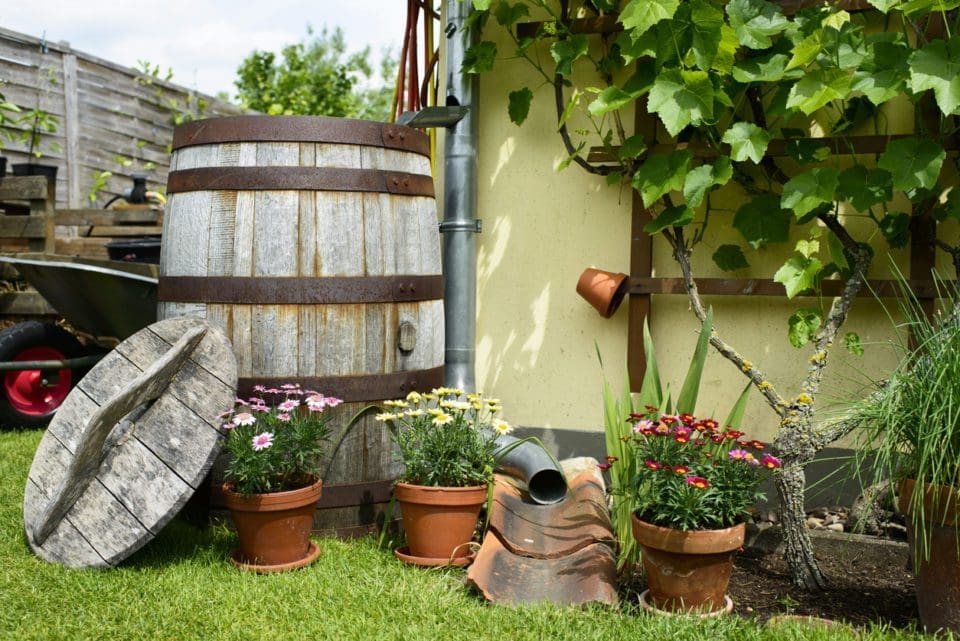
Style and look can also be a consideration. Although the standard plastic barrel types are usually the cheaper options, you might be worried about how it will look in your garden. Thankfully, there are other options, including genuine wood barrels and plastic barrels styled to look like terracotta pots and stone containers. With a bit of research, you can find a water butt that is both a useful and attractive addition to your garden.
How to install a water butt
Next, you’ll want to think about where to place the water butt. Select a firm, flat surface to sit your water butt on. Remember you’ll want to be able to get a watering can under the tap, so you might want to elevate the butt slightly. Of course, you will also need suitable guttering and a downpipe to collect and divert rain into the container.
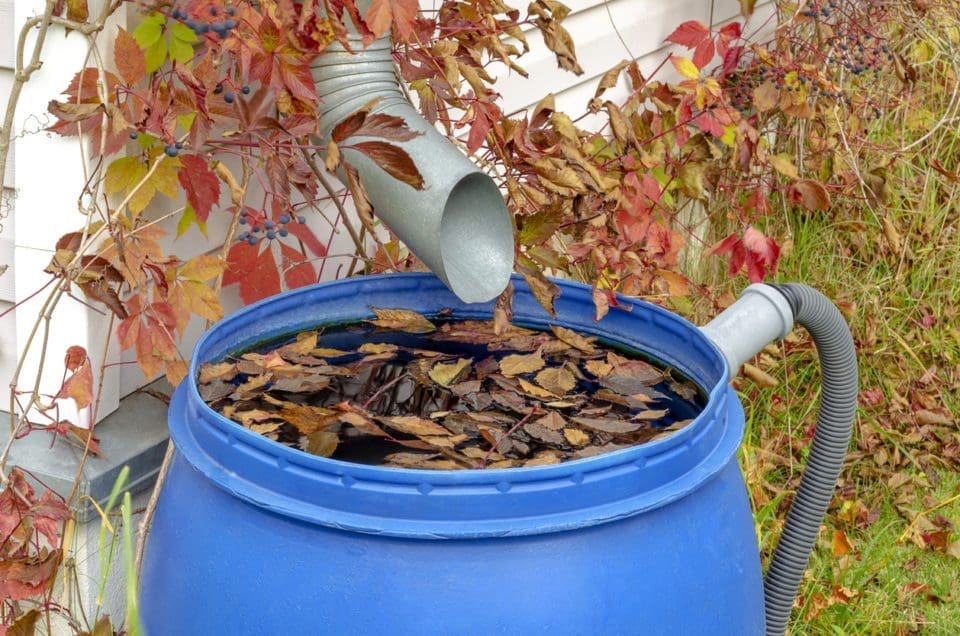
To fit the water butt, you can either cut the downpipe and place the water butt directly below, or you can install a water diverter, which can attach to the existing downpipe.
To attach the diverter, measure the height you need the diverter to be, and then saw the downpipe. You can then attach the diverter, and insert the sawn-off base of the downpipe back into the base of the diverter. You may also need to drill a hole into the barrel in which to insert the hose of the diverter.
The final important thing to be aware of with water butts is that it’s important to make sure it’s covered. This will keep the water cleaner and minimise chances for mosquitoes.
April is a great time to install a water butt in your garden. See what else to do in your garden in April here.