It can be hard to leave your garden when all those spring-sown goodies need your attention. But with these tips it is possible to have a holiday and come back to a thriving garden.
Many gardeners time their holidays to coincide with the ebb and flow of the veg plot and wouldn’t dream of going away until everything is safely harvested.
But it needn’t be such a worry. There are lots of simple things you can do to reduce the impact of being away at a time when plants may be at more risk from drying out, even if you are not lucky enough to have a friend or family member to call on to pop in and keep things ticking over for you.
Enjoy more Kitchen Garden Magazine reading.
Click here to subscribe & save.
1. Cover up with mulch
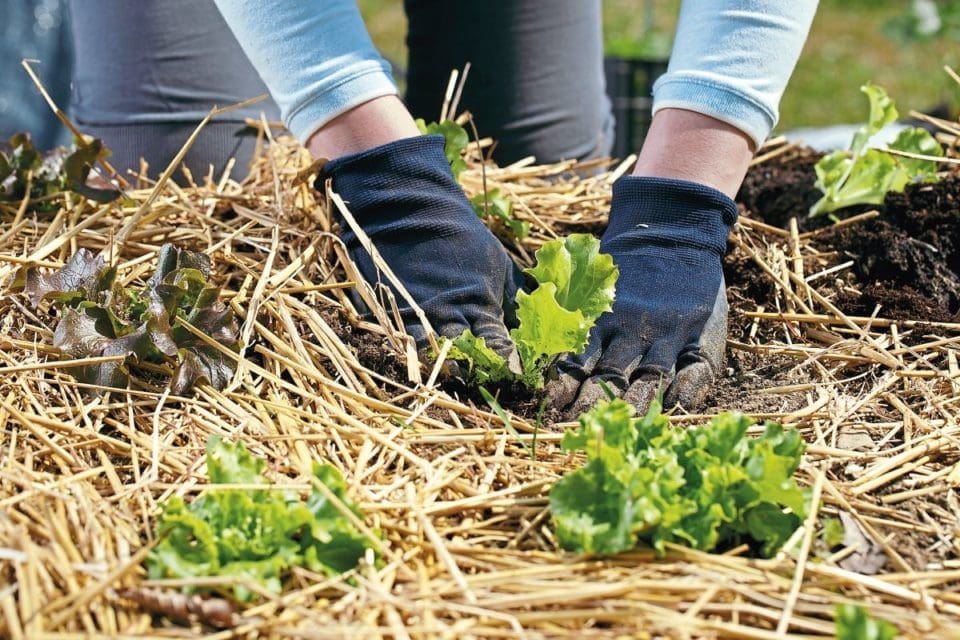
Anything you can do to reduce water loss from the soil will help your plants cope until you return, and mulches offer a simple, but effective, solution. Anything will do – from home-made compost or leafmould to spent potting compost, purpose-made mulching materials such as straw-based Strulch (or straw itself), grass clippings or soil covering materials.
MULCHES – DO’S AND DONT’S
- Before mulching add a dressing of general fertiliser to boost nutrient levels unless already applied for a crop.
- Always water the soil well after applying fertilisers and before laying a mulch
- Don’t be mean with mulches – a good 5cm (2in) is the minimum. It is better to mulch what you can to this depth than to try and make it stretch
- Mulches such as rotted manure and Strulch should not be allowed to contact the stems
- Any mulches (e.g. grass clippings) should be weed and herbicide free
2. Utilise shade

Warm summer winds can sap water from the soil, and while this may not affect deep-rooted or well-established plants too much, shallow-rooted and leafy types such as lettuce will quickly wilt.
Planting in the shade of a taller crop such as climbing beans can reduce the problem and also acts as a windbreak. Fences and walls can be used to the same effect, or you can create a temporary windbreak using a few canes and a piece of shade netting to diffuse those warm summer breezes.
Planting closer together or mixing crops – for example growing vulnerable crops such as lettuce and those prone to bolting such as salad leaves, radish and beetroot among taller ones, again provides cooling shade.
3. Ventilate greenhouses
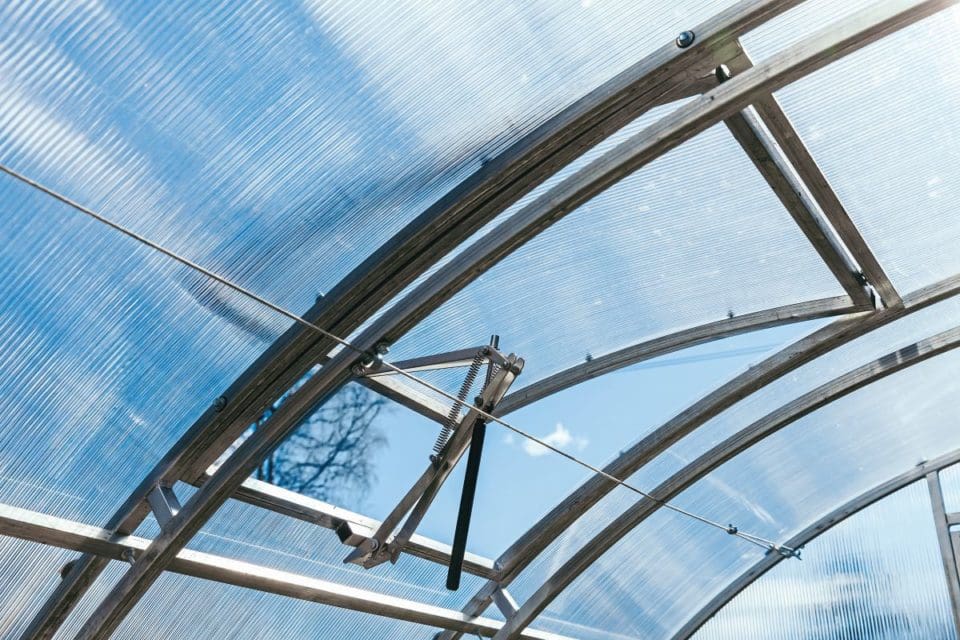
The most vulnerable part of the garden must be the greenhouse or polytunnel where temperatures quickly soar, and where no reviving rain can reach your crops. But here many of the same techniques can help keep your plants ticking over.
Of course, you should ventilate as much as possible, and this can be easily automated by adding autovents (e.g. baylissautovents.co.uk) to both roof vents and louvres. In fact, these are a great investment for much of the year since they will often open before you get up and take care of things while you are at work.
Extra ventilation can be added in the form of fans – either solar or powered depending on if you have an electricity supply handy (e.g. www.twowests.co.uk). They can be fitted into the glass or cladding, preferably in the apex, or can take the form of a fan heater/cooler on the pathway.
Leaving the door open while you are absent is a good idea as long as no very strong winds are forecast and animals and birds can be kept out by suspending bead or strip door curtains on the doorways. These may even provide a little shade and deter some flying pests.
Greenhouse shading, either in the form of blinds or spray-on compounds (e.g. Gardening Naturally Greenhouse Shading), have a great cooling effect in summer.
4. Use capillary matting

This comes in very handy all year round but is especially useful as a stopgap while you are away. Covering the greenhouse benching in a layer of capillary matting, preferably over a layer of polythene to reduce water loss from beneath, can help to keep a reservoir of water around the roots for a day or two, but dip one end in a reservoir of water positioned nearby and the matting will wick the water up by capillary action and replenish itself.
The same can be done using the draining board and kitchen sink indoors if you just have a few pots of herbs or salad leaves to keep moist.
A few watering systems use capillary matting as a wick such as the Duogrow. Here the pots sit over a reservoir of water and are connected by a wick of matting which absorbs water as the plants need it.
5. Set up passive watering systems
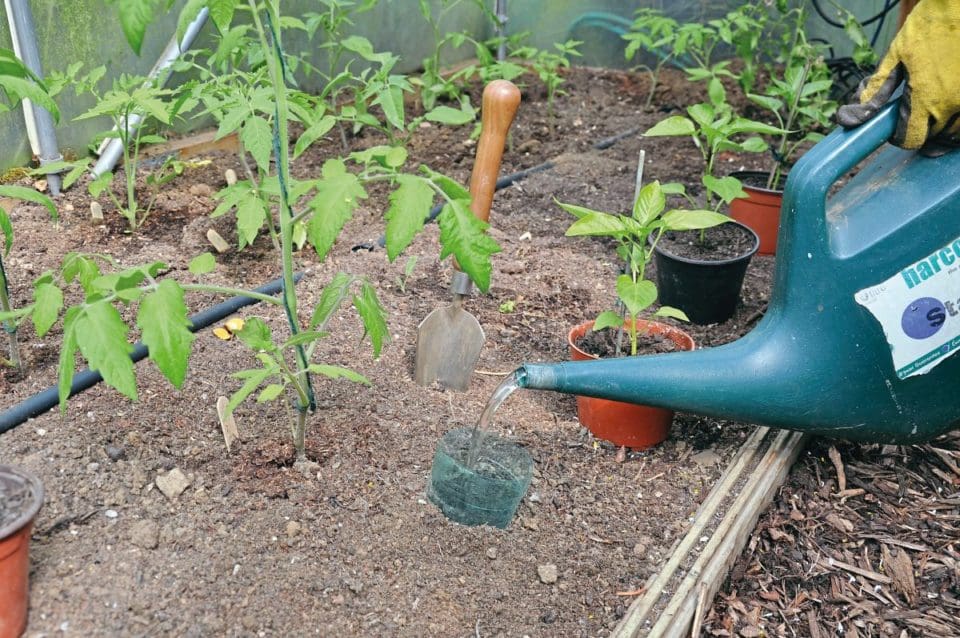
Of course, keeping plants watered is a year-round problem in warmer climes and gardeners have been coming up with ingenious ideas to help them make best use of scant supplies for millennia.
One such is the berm, a very simple wall of soil about 10cm (4in) high (although it can be as high as you like) around a plant. This acts as a dam when rain falls, helping to prevent it from running away before it can soak into the soil around the roots – great for very thirsty plants such as squashes.
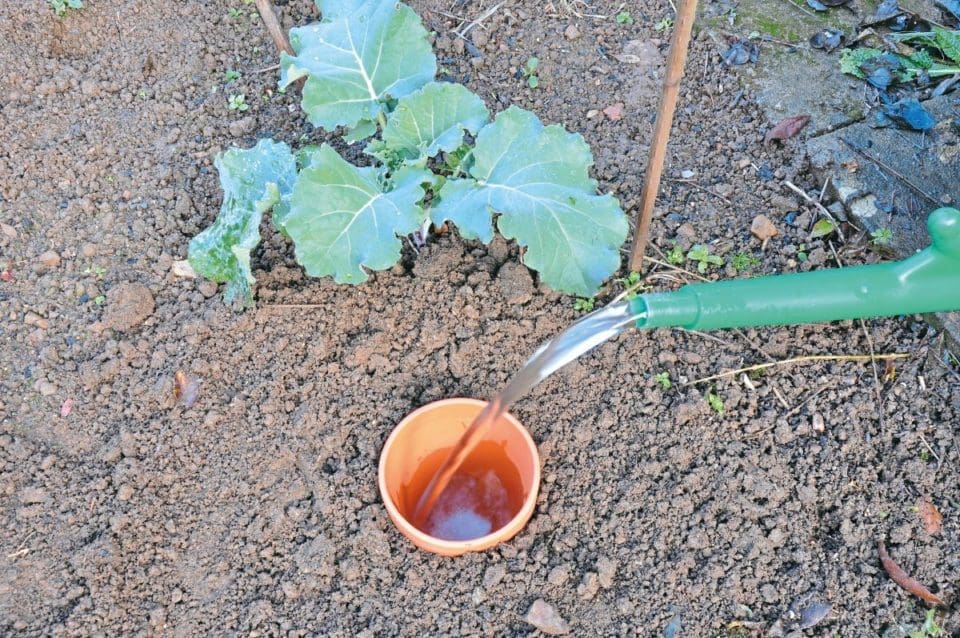
Ollas offer another very simple way to slowly release water around the roots and this idea was suggested by KG reader Nate Jordan who has used them in his own plot in the Channel Islands with great success. Ollas are simple porous jars filled with water and buried near the roots where the content seeps slowly into the soil. Purpose-made ollas can be quite expensive to buy but are easy to make.
Making an Olla step by step (with pictures)
STEP 1: Simply take a piece of Blu Tack and use it to cover the hole in the base of the pot. Press in place firmly. Alternatively fill the base with a little ready-mix cement
STEP 2: Bury your pot to the rim close to the plants you wish to water. The larger the pot the more plants it will sustain and for a longer period
STEP 3: Cover the plot with a saucer and if necessary, place a stone on top to keep it in place. This reduces water loss and stops ground beetles from falling in


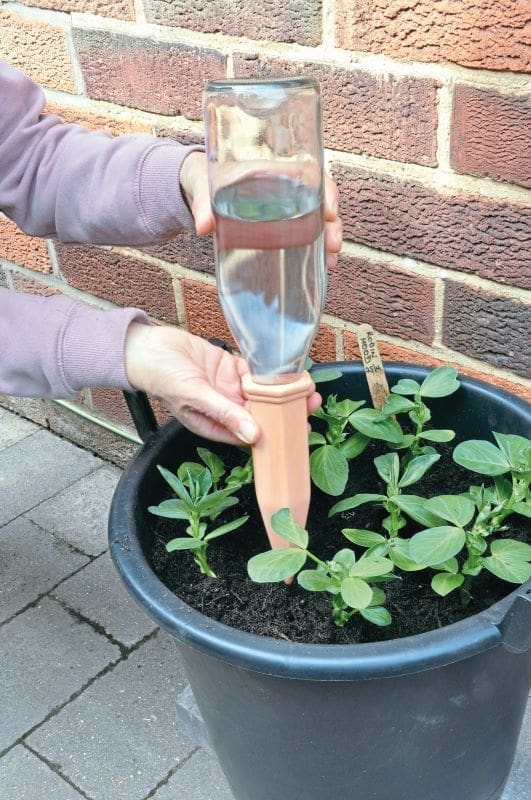
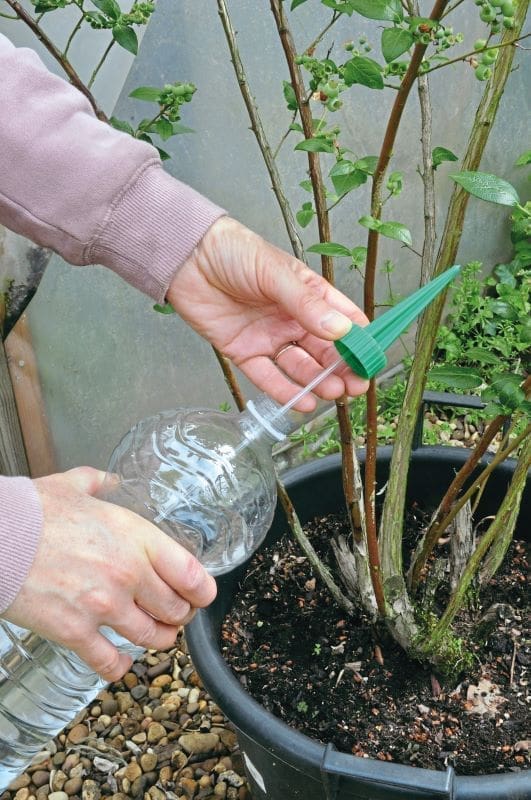
WATERING SPIKES
Various watering spikes are available, many using recycled plastic or glass wine bottles as a reservoir, and these are great for watering individual plants such as tomatoes for a few days or even a long weekend.
The Hydro Wine from BioGreen is a stylish terracotta spike that fits any standard wine bottle and acts a little like an olla, the water seeping slowly through the walls of the spike and into the soil for up to 10 days.
DRIP IRRIGATION
Learn how to set up a drip irrigation kit here.