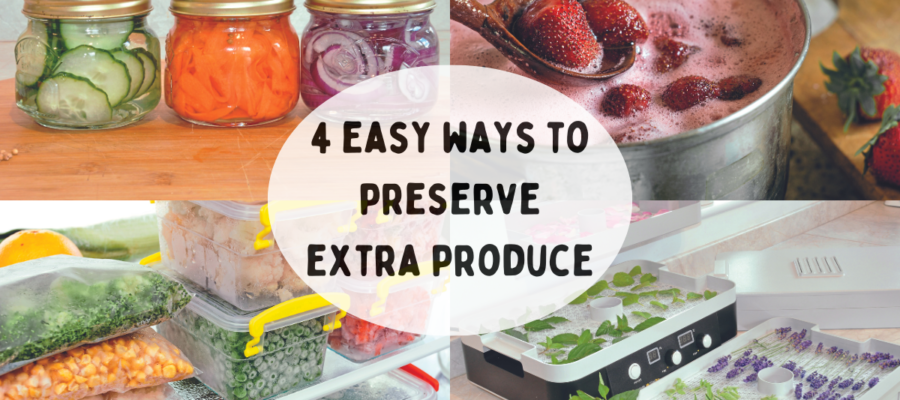
Kitchen Garden editor Steve Ott looks at some simple ways to store produce through the winter to save money, brighten your diet and even provide some home-made luxuries and gifts.
No matter how well we plan, having more produce than we can use at any one time is a common problem. But with prices rising ever higher, wasting food simply isn’t an option and we need to look at ways to convert gluts into storable ingredients or into jams and pickles so that they are available for times when fresh pickings are scarce. While we are at it, we can also make some free luxuries for the home or as gifts for friends.
While a few crops are difficult to store and must be used at their peak soon after picking, most can be preserved in some way. Here are a few ideas to help you make the most of any produce you are unable to use immediately, but which could help reduce your food bills later in the year when there is little around to pick. Plus some ideas for delicious and calming herbal teas and potpourris.
Enjoy more Kitchen Garden Magazine reading.
Click here to subscribe & save.
1. Preserve produce by drying
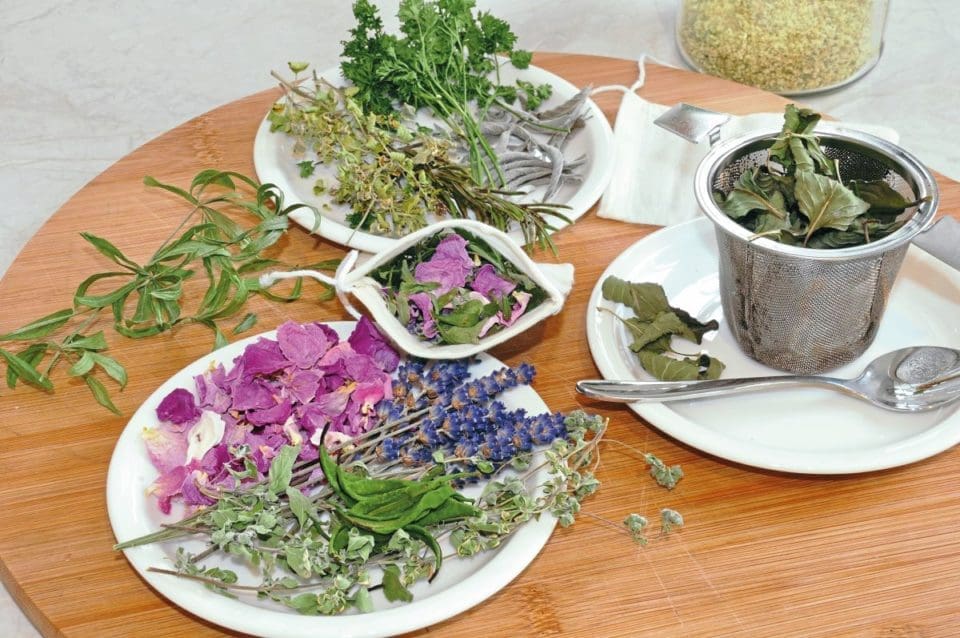
With our cool climate, drying produce may not be the first method you’d think of turning to when filling your store cupboard, but think again. With a modern and efficient food dryer you can dry anything from herbs for herbal teas and bouquet garni to fruit such as strawberries and apples for cereals, cakes and fruit leathers (a healthy alternative to sweets). You can dry flowers for scented bags and potpourris, and you can even make your own dog treats!
Drying is a very effective way of preserving since dried produce stored in an airtight container and below 21C (70F) can last for up to 20 years depending on type. It’s also light and easy to store.
There are lots of food dehydrators on the market and prices start from £30 to £300 or more. You get what you pay for and how much you spend may depend on how much produce you intend to dry. The model we show in our pictures is a L’Equip Filter Pro Digital Dehydrator from UK Juicers (www.ukjuicers.com) and this comes supplied with six trays (four standard and two deep), plus two fruit leather trays, four yoghurt trays and six mesh screens to prevent food from falling through the trays. It is expandable up to 20 trays and air pressure stabilisation ensures even drying across the tray and within the stack. This avoids the need to swap trays around during the drying cycle. It has a temperature range of 35-75C (95-158F), air filter and costs £199.
With any dehydrator it is important not to overload the trays so that air can flow freely over the material to be dried and vegetables and fruit should be sliced reasonably thinly and consistently to ensure even drying. Vegetables with a long cooking time such as potatoes and carrots should be blanched (see below) prior to drying, while fruits such as apples should be dipped in lemon juice and excess moisture dabbed away before placing in the machine.
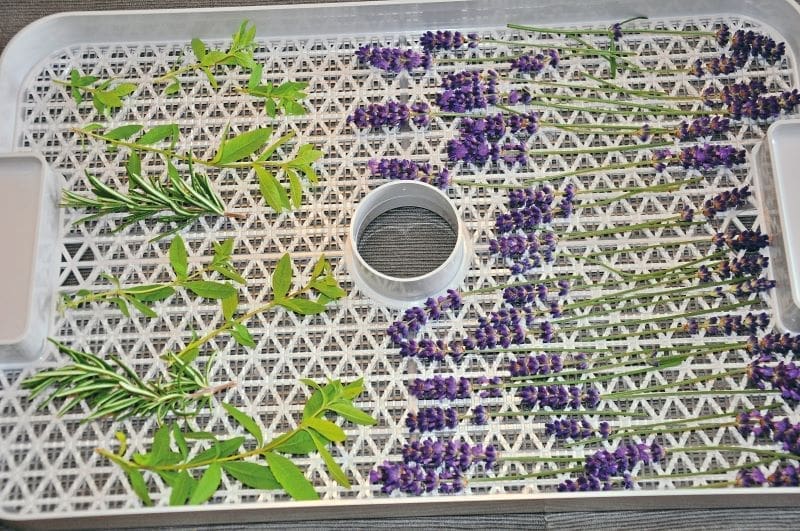
How to dry produce in a food dehydrator step-by-step (with pictures)
STEP 1:
Simply load your trays with prepared herbs, fruit and/or vegetables, allowing some space between individual pieces.
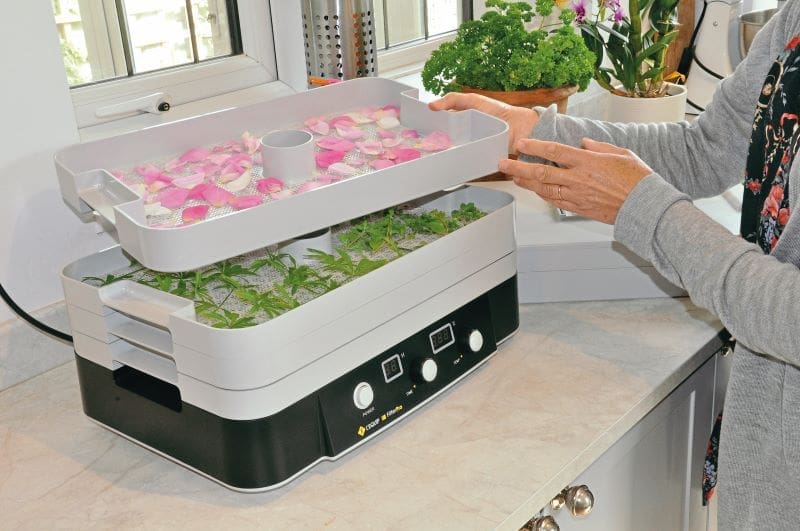
STEP 2:
Stack your trays over the dehydrator, ensuring they fit snugly and finally add the lid.
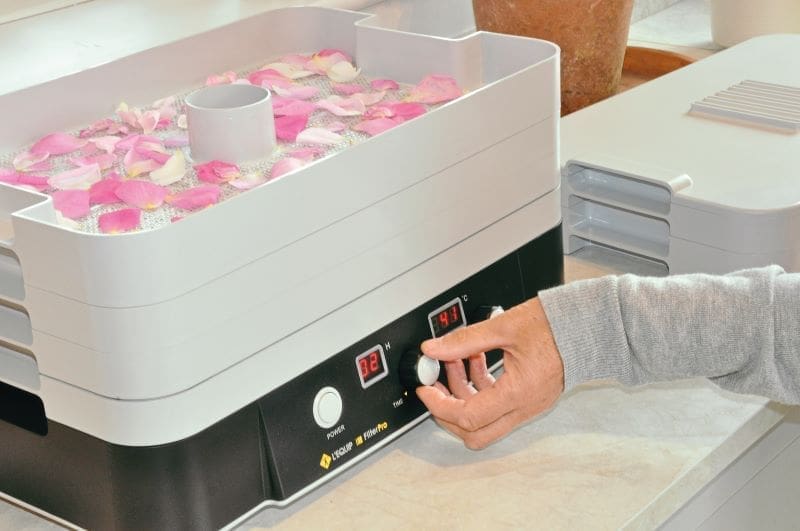
STEP 3:
Turn on the power, adjust the drying time and temperature and check the produce now and again, removing fully dried material, allowing the rest more time to dry.
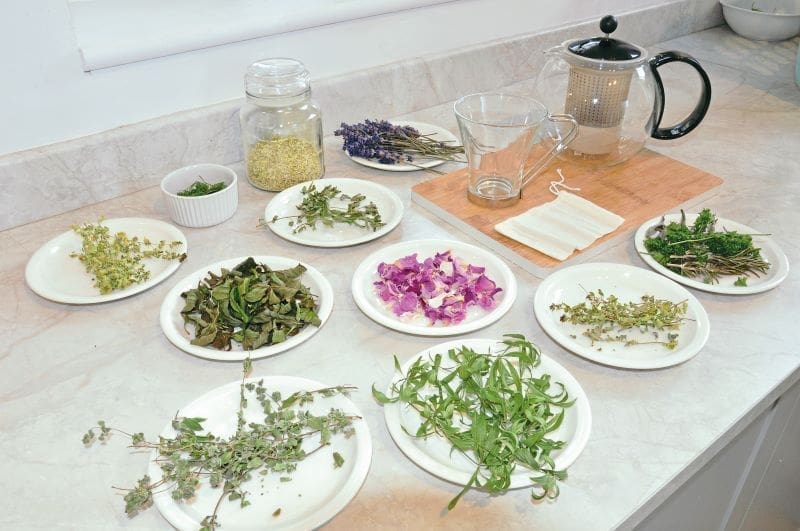
STEP 4:
Our dried home-grown herbs and flowers waiting to be made into floral treats to scent the room or for relaxing herbal teas. Reusable bags for scenting drawers or brewing are widely available.
2. Preserve produce by freezing
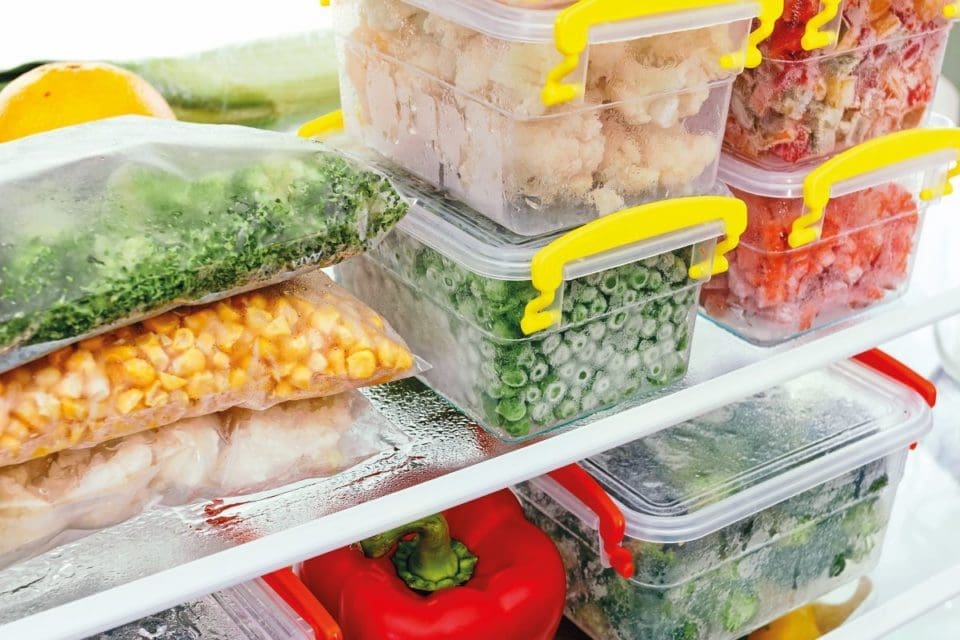
Freezing is a much more familiar way to store food in the UK. Most popular home-grown crops can be stored in this way – directly, after a little preparation including washing, trimming and blanching; after cooking, as in the case of tomatoes to make passatas and sauces; or after turning into ingredients for other things such as pies, compotes or soups.
As with any preserving method, only the best unblemished produce should be used. Any with pests or bruises should be used right away.
What is blanching?

Blanching is simply heating and then cooling food. The heating, usually for just a minute or two in boiling water or steam, inactivates enzymes in the produce that tend to reduce the storage time when frozen. It also helps kill any microbes that may be present on the surface and softens the texture. The food is then quickly plunged in iced water to halt the cooking process.
Once cooled the produce can be divided up into convenient portions and placed in labelled freezer bags where most will store for up to 12 months.
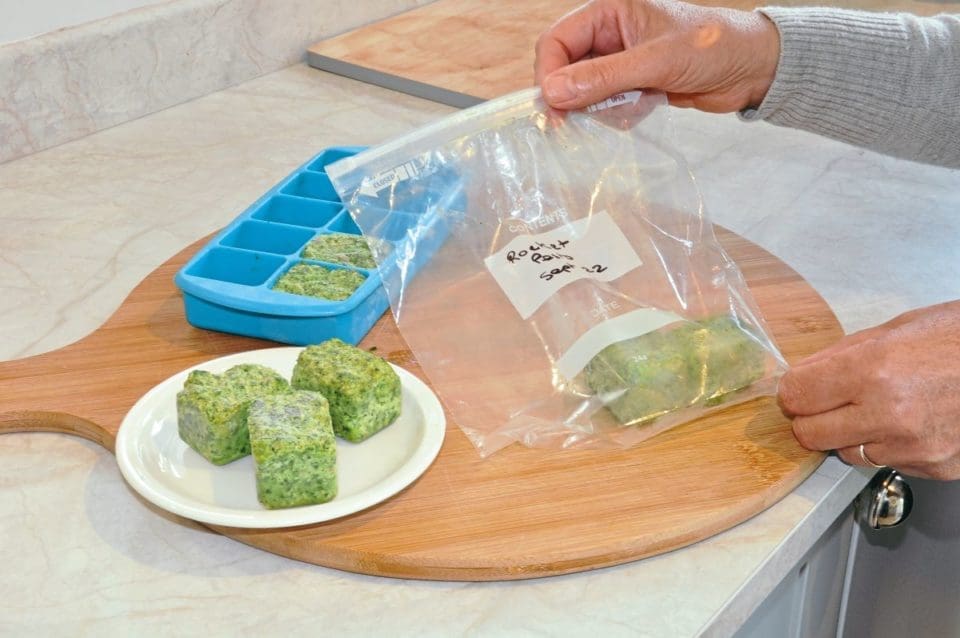
Cubed for convenience
While on the subject of freezing, a convenient way of storing some produce for adding to soups, stews or drinks is to freeze in ice cube trays. The classic of course is to freeze borage flowers or mint in cubes to add to drinks, but how about freezing pesto to drop into the pan when cooking pasta dishes?
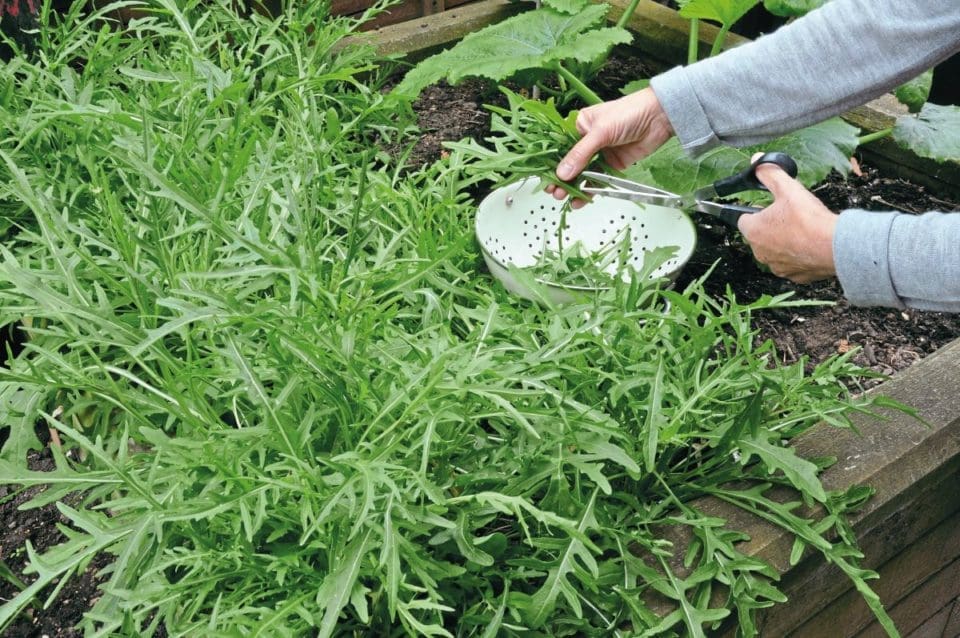
Traditionally pesto is a basil-based experience, but it is also a great way to use up rocket which is coming to the end of its useful life and would be too tough and fiery to eat raw (see below).
After heating produce, cool rapidly to ensure that it stores for as long as possible when frozen or dried
How to preserve rocket in a freezable pesto step-by-step (with pictures)
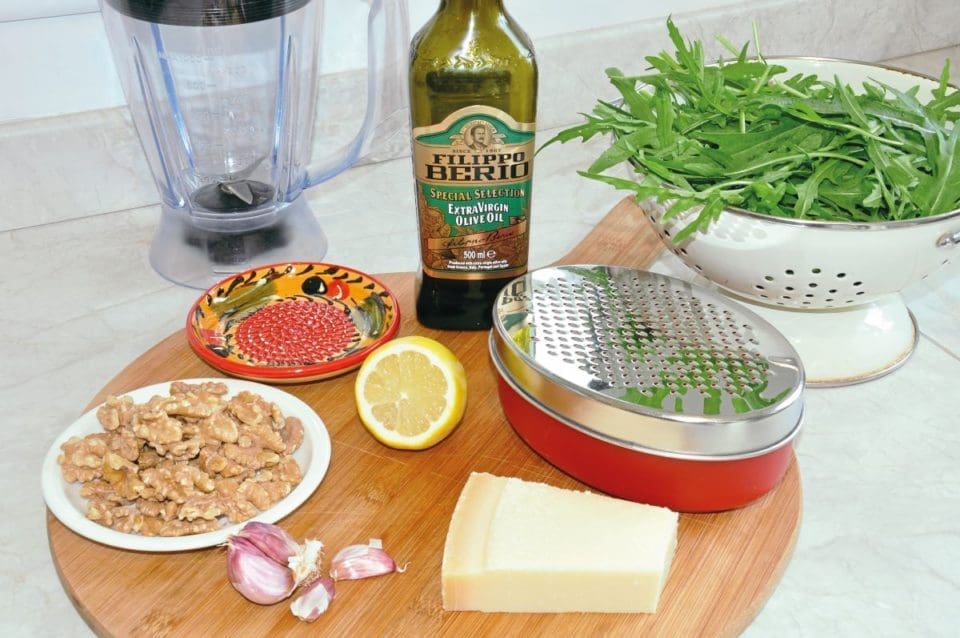
For your pesto you will need:
- 50g walnuts
- 100g fresh rocket
- 50g Parmesan cheese
- 150ml extra virgin olive oil
- Squeeze of lemon juice
- 1 clove garlic, crushed or minced
STEP 1:
Cut your rocket and give it a rinse to remove any dirt or unwanted visitors, then dry in a salad spinner. Lightly toast the walnuts in a pan, ensuring they do not burn.
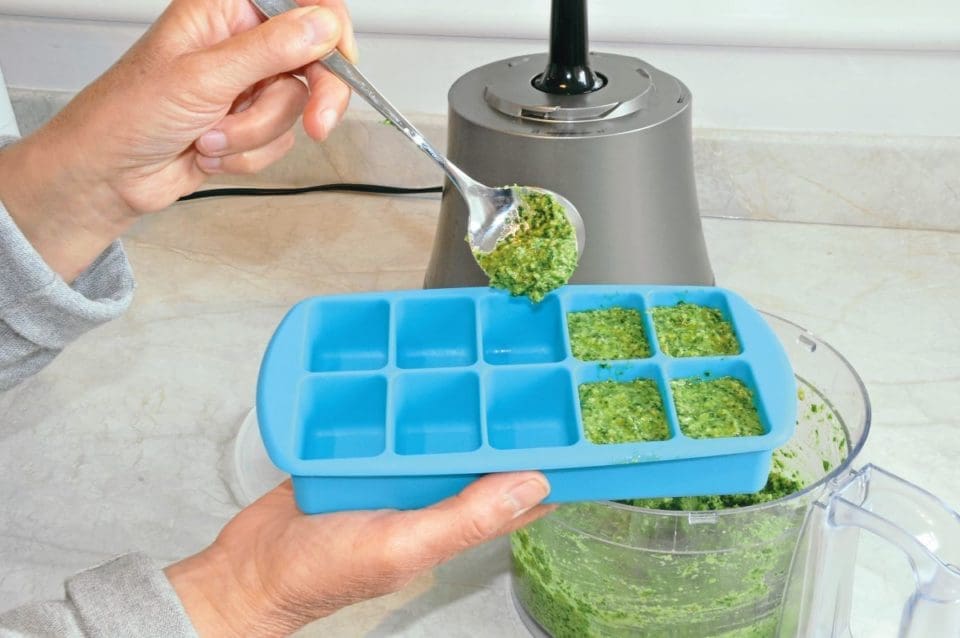
STEP 2:
Add the ingredients to the food processor and blitz until fairly smooth (but leave some texture) before spooning into a silicone ice cube tray. Cover and place in the freezer.
STEP 3:
Once frozen decant into freezer bags and label clearly. Your rocket pesto should store for up to a year in the freezer.
How to preserve herbs with a freezable herb butter
A great way to preserve herbs is as herb butter which can be frozen after making. Parsley, rosemary, coriander, sage and chives are good candidates for this and often maintain better condition than with other methods. You can add combinations of herbs to taste and other things such as garlic, a little rock salt or lemon zest to add to the flavours.
Naughty but very nice, herb butters are great with fish, corn-on-the-cob or simply melted on to a fresh, toasted baguette to eat on its own or with pasta.
How to make herb butter step-by-step
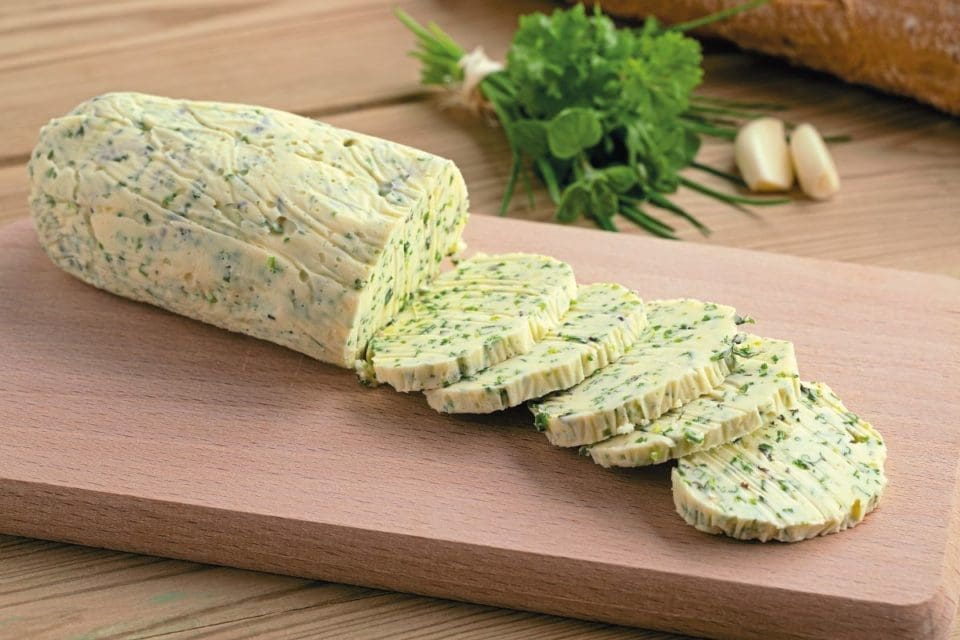
STEP 1: Allow butter to reach room temperature so that it softens a little.
STEP 2: Wash and chop your chosen herbs and any other ingredients finely.
STEP 3: Thoroughly mix all the ingredients in a dish using a fork.
STEP 4: Use a sheet of greaseproof paper to help form the butter into a log shape.
STEP 5: Cut the log into portions before wrapping thoroughly in clingfilm and freezing or using straight away to melt over new potatoes, steaks or lightly steamed vegetables.
Defrost your herb butter for 24 hours in the fridge before use and it will store for about six months in the freezer or a couple of months in the fridge.
3. Preserve produce by pickling
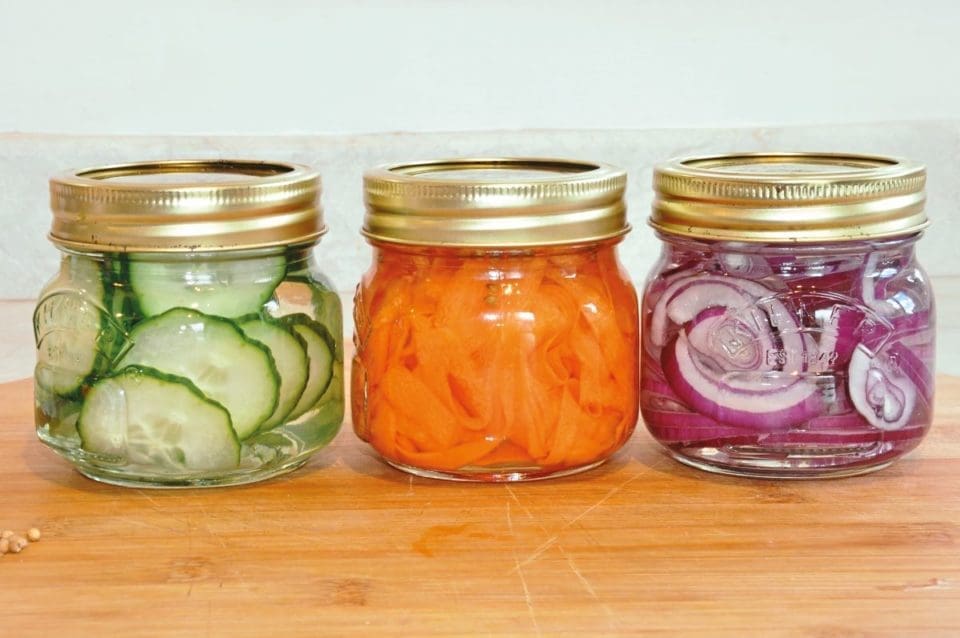
What would a winter store cupboard be without some delicious pickles or fermented vegetables? These preserving techniques offer the perfect way to store such veg as cabbage, cauliflower, cucumbers (or gherkins), winter radish and more.
Low-calorie fermented veg or kimchi is very popular and offers a way to store vegetables such as cabbage for up to three months (in the fridge). This method is also said to have health benefits due to the live probiotic bacteria it contains, which are great for gut health, as well as having lots of vitamins.
Our quick pickles are based on a Dr Rupy recipe and while they won’t store for very long (up to two weeks in the fridge), they take minutes to make, can be eaten after just 20 minutes and give a sweet and sour crunch to salads, Buddha bowls and wraps.
How to make a quick pickle step-by-step
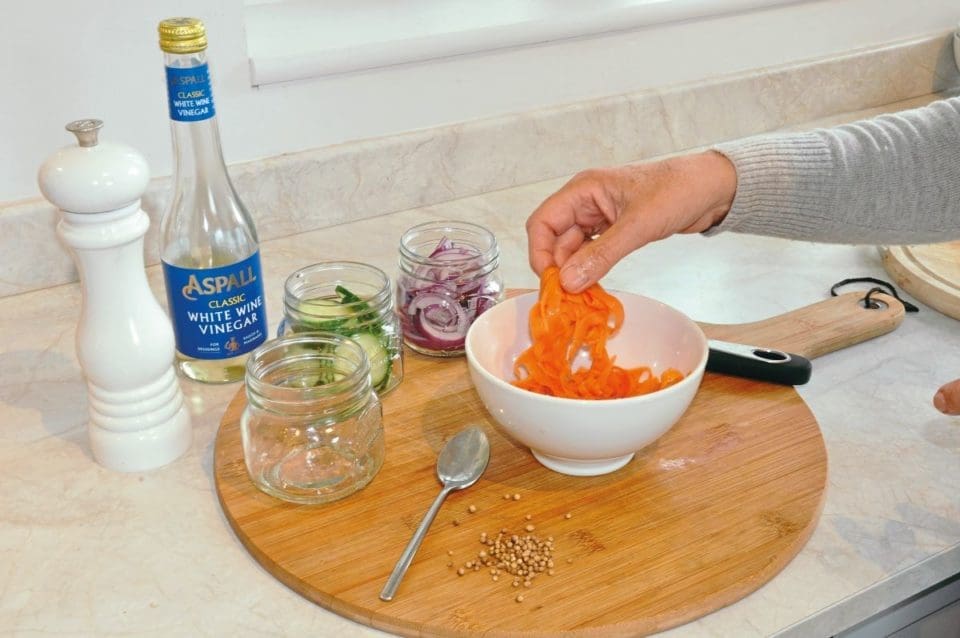
You will need:
■ 125ml (approx.) white wine vinegar per jar
■ 1 large carrot, ribboned with a peeler
■ 1 onion, thinly sliced
■ ¼ cucumber, thinly sliced or baby cues, ribboned
■ 2 tsp sugar
■ 1 tsp salt
■ Coriander seeds, fennel seeds, dill seeds, chilli flakes to flavour (optional)
Step 1: Prepare your vegetables as above, then place singly in a bowl and add the sugar and salt.
Step 2: Massage the vegetables for a couple of minutes until excess liquid is drawn out. Drain.
Step 3: Pack into clean jars and pour over the white wine vinegar to half fill the jar, top up with water to cover the veg and add your chosen flavourings. Shake the jar.
Step 4: Stand for 20 minutes before using or store in the fridge for up to two weeks.
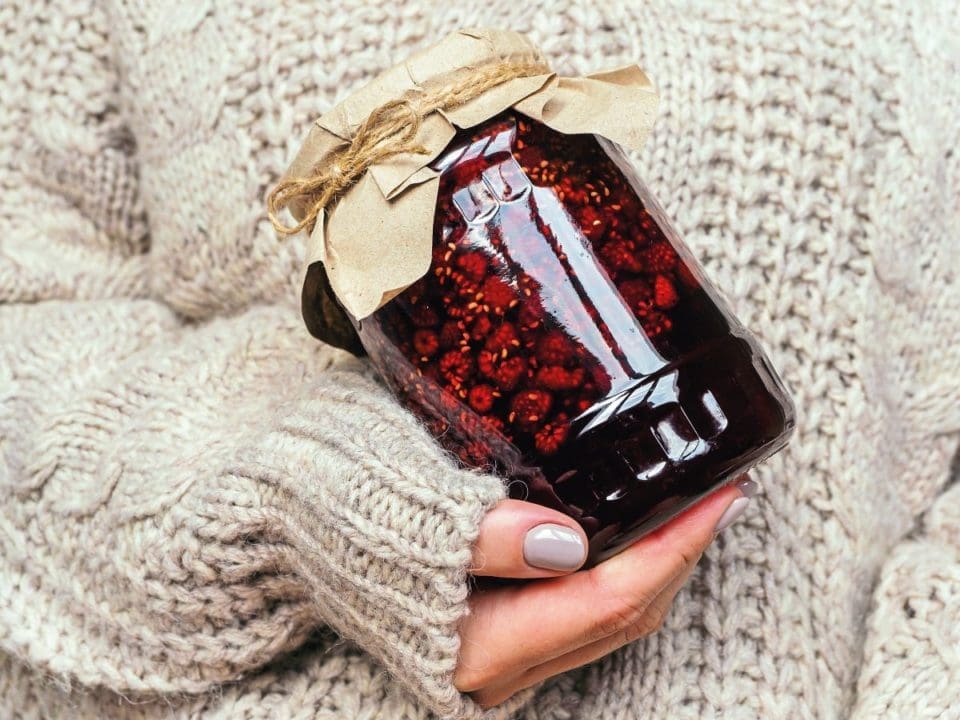
4. Preserve produce as a jam
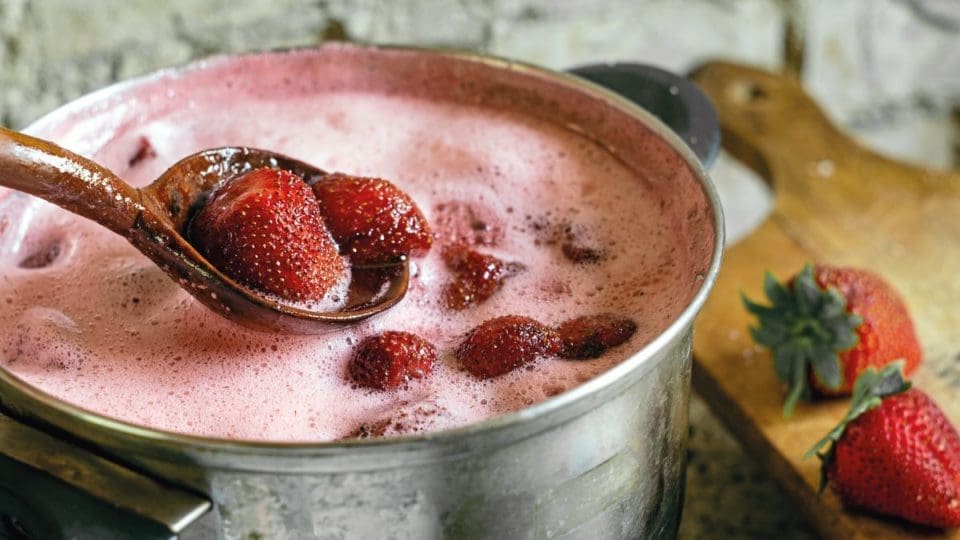
Making your own delicious jams from home-grown fruit is so satisfying and offers a taste of summer all year round. Any fruit can be used to make jam but some, such as gooseberries, naturally contain more of the essential thickening ingredient pectin than others. For fruits such as strawberries and apricots which are usually low in pectin this may have to be supplemented with pectin powder or jam sugar to which pectin has been added.
Most jams use a similar quantity of fruit to sugar depending on the fruit, plus a little lemon juice, and are so simple to make yet store for up to a year in well-sterilised jars with tight-fitting lids. A great gift for family and friends.