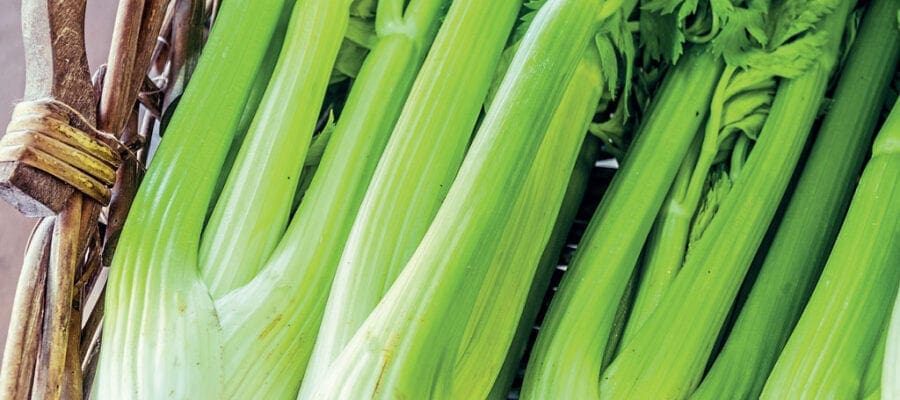
Celery is an integral part of any salad, and cool, crisp sticks freshly picked from the garden are a delight. KG editor Steve Ott offers his advice for growing tasty heads.
This underrated veg is so versatile that it really is a must-have for any plot. The crunchy texture of fresh sticks offers a great contrast to the soft leaves of lettuce and other salads, and is also great for dipping or loading with delicious soft cheeses. It is also an essential base ingredient for so many dishes (e.g. soffritto).
Personally, I like it best cooked. A lunch of warming celery soup is a real treat with some crusty bread after a morning on the allotment, and braising is a great way to use up any plants which may have become a tad too tough to eat raw.
Enjoy more Kitchen Garden Magazine reading.
Click here to subscribe & save.
It does have a reputation for being a little difficult to grow. This is largely due to the fact that it is a moisture-loving plant and as such it can be difficult to give it all the water it needs during the summer months. Getting the soil right is therefore key; alternatively, great crops can be grown in large pots or raised beds.
The old varieties of trenching celery needed to be blanched (light restricted to give longer, more tender edible stems) by part burying and then earthing up as the plants grew. However, the self-blanching types we concentrate on here need no such treatment and make producing tasty stalks so much easier.

Site and Soil
Celery likes a sunny, sheltered spot and a deep, rich, moisture retentive soil into which lots of garden compost or well-rotted manure has been added. This helps retain moisture while encouraging drainage. The pH (lime levels) should be in the range of 6.5-6.8 – about normal for many UK soils.
If your plot grows good crops generally, you should be okay. However, add lime at the recommended amount if experience or a soil test (kits available from your garden centre or online) suggests this might be needed.
Sowing
Sow celery seeds from February to April, sowing in small batches in succession every three to four weeks to ensure a continuous supply from August to November and beyond.
Celery is not a hardy crop so is best sown in pots, trays or cell trays using any good peat-free sowing or multi-purpose compost. Water the compost well prior to sowing, and sow thinly over the surface of the tray. If sowing in cells, sow two or three seeds per cell and thin to the strongest, thus avoiding the need for root disturbance later.
The seeds are small and can be mixed with an equal quantity of dry silver sand to bulk them up to make it easier to sow thinly and evenly (see page 30 for more advice on sowing).
Light aids germination which can be slow, often taking 21 days or more, so seeds can either be left uncovered and gently pressed into the compost with a flat board or similar, or just lightly covered with a thin layer of sieved compost, perlite or vermiculite. This covering allows light through to the seeds, but also helps prevent them from drying out too much.
Place your sown trays or pots in a tray of water to ensure they are soaked and then move to a heated propagator set to around 18C (65F). Cover with a suitable lid. Remove the lid each day and wipe away condensation, spraying the seeds over with a fine mist spray if they appear to be drying out.

Once the seedlings have germinated, they can be uncovered and moved to the greenhouse bench or similar, or even a sunny windowsill and grown on in slightly lower temperatures – 15C (60F) is ideal.
If you sowed the seeds in trays, prick the seedlings out once they are large enough to handle into individual cells or small 7.5cm (3in) pots filled with multi-purpose or potting compost. Maintain watering to keep the young plants growing steadily.
It is essential to maintain the temperature while the young plants are developing. If they become chilled they are likely to bolt (run to seed), and if you are unable to do this it is better to delay sowing until temperatures naturally start to rise.
If you would prefer to buy in young plants rather than produce your own, many seed companies and young plant suppliers do sell plug plants.
Planting Out
Your celery plants can be planted out once the frosts are over in your area. For the south of the country this is likely to be around the end of May, but perhaps three or four weeks later in the north. By this time they should have developed into healthy young plants.
Harden them off (acclimatise to cooler outdoor conditions) prior to planting out. This is essential, since a sudden drop in temperature might cause them to bolt. Take them outside during the day and bring in to a frost free place at night for seven to 10 days before leaving outside permanently.
Growing On
As the plants develop they should never be allowed to dry out and this obviously becomes more important as the summer progresses. To help you can mulch the plants in midsummer after feeding with a general fertiliser such as Growmore, or chicken or comfrey pellets.
Use well rotted compost or manure, taking care not to get it in the crown of the plants. Alternatively, you could consider planting through reusable plastic mulch or ground cover fabric which will deter weeds and help retain moisture.
Take regular precautions against slugs and snails using your favoured form of control and weed the rows regularly by hand so as not to damage the developing plants.

Harvesting
Self-blanching celery should be ready for harvesting from 18 to 25 weeks after sowing, depending on the variety. The normal method is to lift whole plants as required, trim off the roots and top growth with a sharp knife. Heads of F1 hybrids will often be ready together, and sowing in succession can help with this.
If you only have a few plants in a pot and need a few sticks for a salad you could instead cut as much as you need from your plants as required.
Plants for late harvesting should be covered with several layers of fleece to protect them from frost.